An optical flat is a precisely polished flat surface which may be used as a reference to measure the flatness of an unknown surface.
Artifex Engineering offers both single surface and dual surface optical flats.
We will gladly customize to your requirements.
Additionally we offer standard optical flats in N-BK7 or Fused Silica. We offer two different levels of accuracy: λ/10 and λ/20 for our single surface optical flat. For our dual surface optical flat, λ/10 is available. The secondary surface of our single surface flats is pitch polished to window quality for viewing the interference pattern. Our dual surface optical flats are precision ground and polished to stated accuracies on both surfaces so that either face may be used for test applications.
We provide a Zygo® test report with each flat.
® Zygo is a registered trade mark of Zygo Corporation
Optional Accessory: Felt lined protective case with hasp.
As with all of our optics, we will gladly provide these items custom designed to your particular requirements. The range of specifications is given below:
Range of dimensions: 5mm – 600mm
Highest available surface figure: λ/20 (DIN: 3/0.1)
The secondary surface of our single surface flats is pitch polished to window quality for viewing the interference pattern.
Our dual surface optical flats are precision ground and polished to stated accuracies on both surfaces so that either face may be used for test applications.
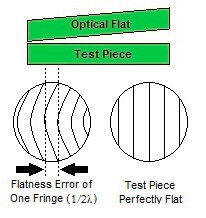
Interference fringes formed between an optical flat and a device under test when viewed under monochromatic light give a visual representation of the flatness of the surface being tested. The surface accuracy is indicated by the amount of curvature and spacing between the interference fringes.
Measurement of the surface flatness of polished surfaces can be determined visually by comparing the variations between a work surface and the surface of an optical flat. These are versatile optical components used in many applications such as: inspection of gauge blocks for wear and accuracy, as well as the testing of various components including windows, prisms, filters, mirrors, etc. They can also be used as extremely flat optical windows for demanding interferometry requirements.
An optical flat utilizes the property of interference to exhibit the flatness on a desired surface. When an optical flat, also known as a test plate, and a work surface are placed in contact, an air wedge is formed. Areas between the flat and the work surface that are not in contact form this air wedge. The change in thickness of the air wedge will dictate the shape and orientation of the interference bands. The amount of curvature that is shown by the interference bands can be used to determine the flatness of the surface.
The determination of the flatness of any particular region of a surface is done by making two parallel imaginary lines, one between the ends of any one fringes, and the other at the top of that same fringe.
The number of fringes located between the lines can be used to determine the flatness.

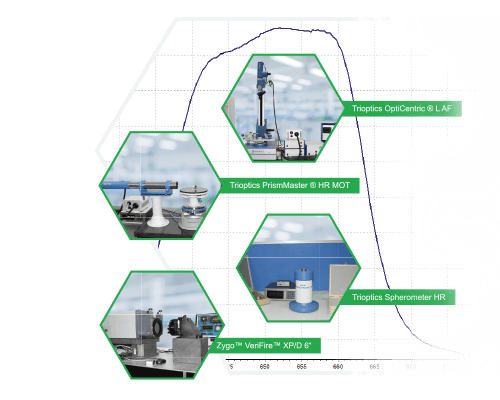
We take quality control very seriously: we rely on accurate, widely recognized measurement systems for testing our optics. The following table indicates the accuracy of measurement for the most relevant parameters.
Surface figure: λ/20
Angle: 0,5 arcsec
Radius: 0,01%
Focal length: 0,03%-0,3%
Centration: +/-0,2µm or +/-2 arcsec
Wavelength: +/-0,3nm (190-1100nm)

We are known for:
Over 30 years experience in optics
ISO9001:2015 Certified
from the very first contact
at remarkable prices